Search This Blog

Friday, December 30, 2011

The Big-3 and the little-3

I ran across a brochure that came with one of my recent purchases that I consider to be priceless.
How many times has your sewing machine just decided to stop sewing correctly. It was sewing fine last week, but now, it's doing all kinds of weird things. "What is going on"
I can only speak for myself, but I don't know how many times I just gave up trying to figure out what was going on only to return the next day to find I had missed the simplest little thing.
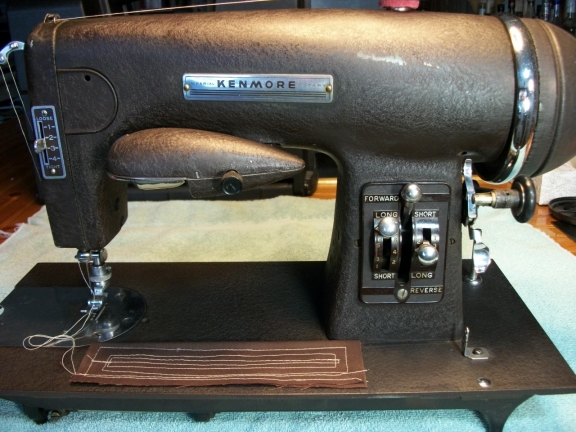
This brochure was put out by Kenmore, and I would guess, in the mid 60's.
(I hope you can click on the pictures to make them bigger)

Front Cover

 The BIG 3


the little 3


Even though this brochure is specific to a certain style of machine, it can be easily translated to cover any machine. All sewing machines work the same. A bobbin is a bobbin, regardless how it loads or what size it is. Upper tensions may look different, but they all perform the same duty. Next time your machine acts up, calmly go through the above routine and check The Big 3 and the little 3.
Hopefully you will be one of the 8 out of 10 and correct the problem.

Friday, November 25, 2011

The amazing Singer 201

As for the older, classic sewing machines, I have been partial to the Singer 15-91 for quite a while. The big class 15 bobbin. The verticle oscillating hook. The rock solid, all steel construction. They just didn't make them any better.....or did they. Now that I have finally had the chance to play with a model 201, I am having some second thoughts on my favorite, all time, classic machine. Wow. I didn't think that a horizontal, class 66 drop in bobbin, rotary shuttle machine could keep up with the 15-91. I am very impressed. This 1939, model 201, was used so much that it wore the decals off of the front work area. Much of the clearcoat was gone where old oil was allowed to sit and dry. After a good cleaning and oil/grease, this thing ran like a top.
Or should I say "sewing machine". It just shows me how well these machines were built.


Having the same, direct drive "potted" motor as the 15-91, this machine was a pleasure to use on the heavier
materials even though the motor needs to be pulled and cleaned. It just runs slow but still with plenty of power. I did have to replace some of the wiring and reinforce the rest with shrink tube for safety reasons.
This machine is 72 years old.......


Even though it uses the class 66 bobbin, it is not your standard model 66 shuttle.


Standard pre WWII head plate and the model 66 upper tension setup. 


As you can see, unlike the 15-91....No light in back. It has been designed into the front body cavity.


Look at these stitches. I could sew all day long on this machine! I am going to have to play/sew with this machine under  lots of different conditions before I can determine my new favorite, classic machine.

Thursday, November 17, 2011

I thought all sewing machines turned the same direction.

I had heard about a few machines that actually turned backwards from the standard. I finally got to play with one. White sold many in the 1920's and I believe Free Sewing Machine Co. also sold similar products around the same period. Pictured below is a Kenmore model 117.59, bought in 1938 from Sears, Roebuck and Co. (according to the sticker inside the cabinet) Kenmore continued to release upgraded versions of this same machine. The second release being 1942 and they added an extra "1" to the model number (117.591). In the mid 40's, a model 117.959 appeared. The White Sewing Machine Co. manufactured all of the Sears/Kenmore machines from the 30's through the 50's. The Free Sewing machine Co. manufactured the Westinghouse, and the New Home. The main difference was the upper tension. All had a similar setup using a friction drive tire on the motor. And, the hand wheel on all of them must turn Clockwise to sew. The White Sewing Machine Co. was the first to introduce this flat crinkle finish. It was marketed as a non glare finish which was easier on the operator's eyes.
Every one of these machines that I have seen had a flat spot on the motor friction tire from just sitting at that spot for so many years. So if you tried to run the machine, you would get a " thump.....thump......thump" every time the flat spot hit the hand wheel. I actually found a place to order a new one but I just couldn't wait a week to try and sew after spending several hours cleaning and lubricating this old machine.
I cut the old piece of rubber off and then took 24" of electric tape and cut it down the middle lengthwise. I then carefully rolled both 1/4" wide tape strips around the shaft where the old tire was. Wow, It worked!
The motor mount has a spring that keeps pressure on the wheel and like I said, it worked perfect. I could at least do a sew test. It was a challange to figure out how to thread the machine but just following the rule (#1-tension, #2-Take up, #3- needle) and a little common sense, I guess I got it because it sews beautifully.
I guess I never thought about it before, but the motor itself turns the same way that all sewing machine motors turn. Counter-clockwise. If there was a belt involved here, the hand wheel would turn counter-clockwise. Since the motor is directly connected to the hand wheel by the friction tire, it will turn the opposite way, Clockwise, or backwards to what we are used to today.  

Here is a Kenmore model 117.959 - (different Stitch Lever and Light)

Here is a Free Westinghouse Model ARE

Here is a New Home Model NLB


Friday, November 4, 2011

And here is yet another use for that wonderful product...."Duct Tape"

This was probably a "one in a million" event that happened to a sewing machine recently.
Pictured below, is a motor pulley and the air vent for the motor. Some how, a piece of thread from the spool holder, directly above the vent, got sucked into the vent and several yards were tangled up on the motor pulley and belt. This caused the machine to completely stop working. The LCD Screen showed "ERROR" and nothing would work.  
After removing the thread from the motor pulley, I proceeded to look for a fuse that may have blown.
Opening up these machines can be frustrating.

The arrow points to the location of the fuse I found to be bad. Unfortunately, it was on the other side of this circuit board. These main boards have small plugs lined up all the way around them going to different parts of the machine. I really didn't want to unplug them all just to get to that fuse.
Taking out 4 screws gave me just enough room to get a new fuse in there.

The arrow points to the fuse on the back side of the main circuit board. There are actually 2 fuses side by side. Replacing that fuse got the machine back in working order.
So, How do I keep this from happening again?
I must block the vent but still allow air to pass through. This is what I came up with.
Good old duct tape. I stuck 2 pieces together so they wouldn't stick to anything and then taped that over the vent opening in a way that would still allow air to flow.


It seems to work fine. Only time will tell and if a problem does arise, it can be removed easily.
I am sure the owner of this machine doesn't want to pay for this repair again.

Wednesday, October 19, 2011

The 3/4 size machines By Singer

As my sewing machine adventure continues, I have come across some 3/4 size machines. Heavier than the Featherweight, but around the same dimensional size.  The model 99 is actually a miniature model 66. The 185k has it's own unique body. Both have the horizontal, oscillating  hook and use the standard 66 style bobbins and accessories.
Cleaned and adjusted correctly, these machines sew like a dream. Pictured above is a 1956 Model 99.

This 1958 model 185K has the same, 12" base as the model 99. These always come in green and to the best of my knowledge, are only made at the Kilbowie Plant, in Clydebank, Scotland.  Hence the "K" in the model number. Both machines require some sort of stand to operate. I had to make the one pictured above with the 185K. The Kilbowie Plant also made regular style, model 99's. (99k)
Like I said earlier, these "cast iron body" machines are a bit heavier than the "cast aluminum" featherweights.
If you can't afford a Featherweight, but still want a smaller, portable machine that will sew great and last forever, you can usually pick one of these up for under $50.
I just fell in love with them!

Friday, September 16, 2011

Shipping a sewing machine

From day one, I have heard about the nightmares of buying a sewing machine on line    (E-Bay) and then actually receiving it. I have found out that those nightmares can be true.  A great number of people selling sewing machines don't have a clue what they are doing. In some cases, this can be to your advantage. You can get a great deal. In other cases, you are going to get a boat anchor. Either the machine is no where near the condition it is advertised, or it will be shipped in less then acceptable conditions. Case in Point- I won an auction for a Featherweight 221. It was advertised as "Needle not working".  The Pictures looked good. It was old and I knew I could fix it. It was just gummed up and needed a good cleaning. Now, I really didn't know this for a fact, but for $130.01, I took the chance. I was excited. Six days later I finally received a box that had to be my long awaited "221". I raced it to the kitchen table and grabbed my pocket knife. It didn't take much to open it up. I could tell from the start that it wasn't packed well. It was like a "Cardboard Bag" when I got it. There was a few "Peanuts" and some "Bubble Wrap" but it was pretty much just floating in this "Cardboard Bag". Here is the first thing I saw when I opened the box......
A Singer 221 is a beautifully engineered, 1-piece, cast body. The bobbin winder assembly is part of the entire machine. Snapped right off. The machine is ruined. What were they thinking.
The Plug socket was also damaged due to the same poor packing.
The motor pully also disintegrated. How the heck did that happen?
I am just sick.
I Hope I get my money back. 

Here are the broken pieces recovered from the packaging. I have shipped a half dozen sewing machines to date. I spend at least an hour packing each one to get them "Safe" for shipping.

Singer 347 Belt Adjustment

Probably not a lot of people trying to adjust a belt on a Singer 347, but that is where I found myself here recently.

I wanted to make this classic Singer purr but It just wasn't keeping up after I spent several hours cleaning and servicing. The belt was slipping. There didn't appear to be a belt tension adjustment where I thought it should be. Finally, hidden in the bottom of the machine and part of the motor mount was the adjustment!
I think they call this an eccentric screw adjustment. You loosen the screw, turn the washer with the off set hole, and it tightens the belt by moving the motor further away from the hand wheel.
In this case, the belt was streached too far and beyond the adjustment of this machine. I had to put a new belt on anyways. I ended up using a streach belt. They work fine but don't last as long as the original V-belts.
What a great, simple, early zigzag, sewing machine.
Love that color? Classic 50's! and it sews great.

Friday, September 9, 2011

The vintage "Badge" machine

Recently I have had some  "Singer Clones" that are just beautiful. Not only are they as good as the Singers, they are a bit better. They have features that are not found on the Singer machines of this class. Adjustable feed dog dial setting for free motion sewing. New and improved "pressure foot" adjustment control setting and bobbin winding adjustment to name a few. 
These machines can do anything the Singers can do. They can even exchange parts.
Every thing I tried from a 1955, Singer 15-91 fit this machine.
Japanese factories were pouring out thousands of these machines and US marketing companies were buying them up and selling them with their name on them.
The "Badge"  and decals told the story.
The decals made the name (Precision, Deluxe, Universal, Ambassador, Dressmaker, Goodhouse Keeper, Sewmore, Morse, Peerless,Challenge, American Beauty, Fleetwood, Aldens,
Home Electric Deluxe, Standard DeLuxe just to name a few) and the Logo usually included "Japan" or "Made in Japan".
I don't know if the Singer patent ran out or if the US government was just trying to help out Japan.
These are some great machines.

This machine was sold by Sears.

Another great sewing machine made in Japan and sold as a "Sewmore".

Friday, September 2, 2011

The Singer 200 series

I am a sucker for any $6.00 Sewing machine that looks like it has all it's parts. I just can't stay away from those flea markets. It even came with a nice table. So, here we have a Singer model 252. My only other Series-200 experience to date has been with a model 237.  This paticular machine was made in Italy. These early zigzags seem to be very popular due to their their power and all steel gears and bushings. I havent seen one with a belt drive underneath like this one. It still has to be better than having plastic gears.

This is a simple, zigzag/blind stitch adjustable machine with a needle position lever and a stitch width lever.
Stitch length and reverse on the lower dial knob.
Drop in bobbin and standard bobbin winding.


Remember I said it was Made in Italy.....


And the belt drive on the bottom shaft


If you ever run into one of these machines at an acceptable price, grab it.
These are extremely simple machines. They are easy to maintain. They sew beautifully once you get the tension set. Full speed sewing has no machine vibration. (Extremely well balanced)

Wednesday, August 31, 2011

I finally have a computer again!

I finally have my computer back and I didn't lose a thing. I had some bad RAM that was causing problems.
After all the back-ups and searching for all those files, here is what I ended up with that I really wanted to keep track of. The machines I have worked on so far! (That I remembered to take a picture of)

Sunday, August 7, 2011

Garage Sale sewing machines

I seldom have much luck at garage sales. This week was better than most.
My first purchase was a vintage, "John Denver" LP. Still in the plastic and the vinyl was in mint condition. I had to also buy the first "Greatest Hits" by Elton John. Every song on this was a HIT! Plastic still on the jacket and the vinyl in the sleeve was virtually, un-played. (Did I mention I like the old Records?)
I couldn't even drive across town this Saturday with out seeing Garage Sale signs plastered every other block.
I was on a Quest for SEWING Machines! Here is what I ended up with.


The Singer "Touch-&-Sew" line is new to me. This model 626 was pretty dirty but cleaned up well. I actually got a chance today, to service this machine completely. I had to learn how to wind a bobbin. It is wound in the bobbin case. Very wierd. The bobbins are even wierd. They unscrew top from bottom if you want to strip them quick. I had time for a sew test and it actually sews very nicely with a great zigzag stitch.
  Garage sale Price Paid for this machine .......$5.00

Some how, I came across another "Touch-&-Sew". The model 648 which has a cam stack for several decorative stitches.
It came with a table but was missing the stitch length lever.

Garage Sale Price Paid for machine and table.......Free

I finally got to my original Garage Sale destination that had advertised an "Antique" sewing machine. Here is what I ended up with.


A 1934, 15-91 Singer with sewing table, owners manual, lots of needles but no accessories. Mint Condition. Wow
Garage Sale Price Paid for machine and table.......$35.00

Some days are better than others............

Saturday, August 6, 2011

The Worlds Ugliest Sewing Machine!.........

Lets start right out with a picture.


I saw an Ad for a used sewing machine. It was a "Make me an offer" type ad.
There was no picture but there was a phone number. I called and we made arrangements to meet after I was assured that it was in working order. (except that her nephew had cut the power cord) Yea, he cut the power cord all right. After he pulled the needle clamp off. Took the foot off. Dismantled the upper tension. Took the bobbin cover and needle plate some where , and he or "they" still weren't done. The pressure foot adjustment knob and the thread spool holder were also gone. They ended up giving me the machine.


Not a pretty sight. In fact the machine was an Ugly Mess. Could I possible ever get this thing going again?
Did I even want to?   Well Ya! I took the Sewing machine repair  "Hippocratic Oath" .....I think........

"I will do no harm to any sewing machine, ugly or not, and I will do my best to revive it".

I spent a week researching similar machines and checking dimensions with suppliers and E-Bay parts people.
After about $30 in parts and quite a bit of fabricating, I had this "thing" working. It actually cleaned up pretty well and these old "cast body" machines with all metal gears are hard to kill.


I am still trying to find a good side of it. It just isn't photogenic at all. Anyone ever heard of a Fleetwood?
It's just another Badge Machine from Japan. Here is the best I could do for the Spool Holder.


I am not sure I have the upper tension done correctly because I really don't know what the original upper tension looked like. But, It sewed this on the first try
and I feel like I have fulfilled my obligation to the Oath. And, I learned from this adventure!


This may be a better angle for a picture? It's good side!